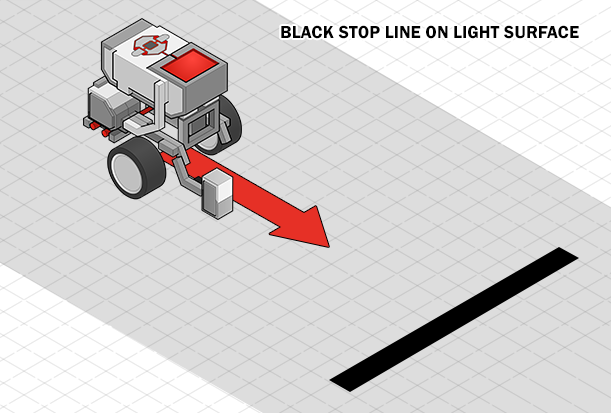
Mini Challenge 1: Forward to Stop Line
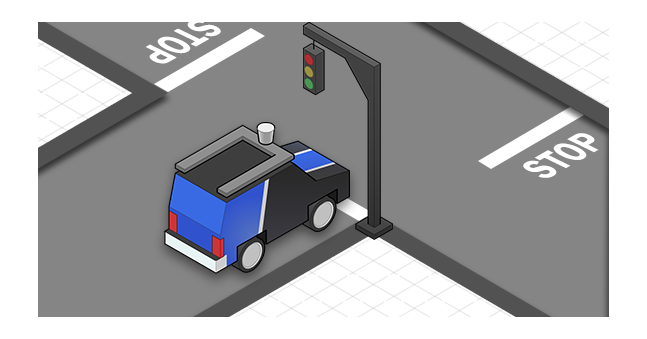
In addition to signs and lights, self-driving cars also need to obey pavement markings,
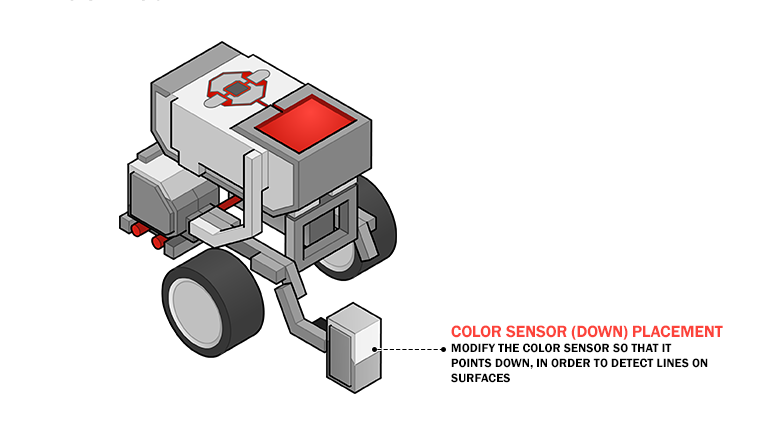
like this stop line marking where to stop. Modify your Color Sensor attachment so that
it faces downward,
and program your robot to drive forward until it reaches the line.
| Virtual EV3 |
If using Robot Virtual Worlds, chose this configuration.

|
| Physical EV3 | If using a Physical Robot, follow the BUILDING INSTRUCTIONS on page 47 in the Lego MINDSTORMS EV3 Education building manual. Instruction manual provided by Lego Education. |
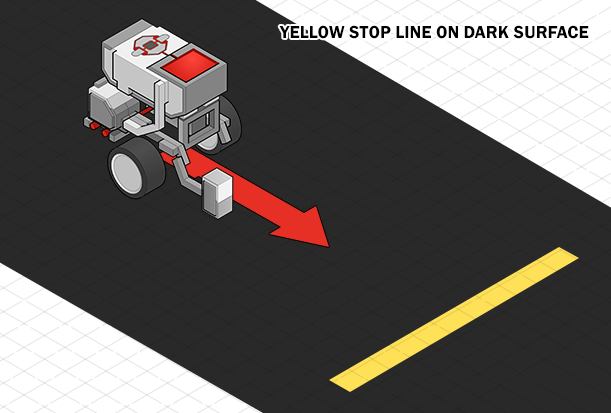
The program is very similar to the "ForwardRed" program.
Program the robot to move forward until it sees the line color
|
The EV3 Color Sensor can detect 7 different colors, plus the absence of color. Each of these 8 colors is labeled with a different number. |
|
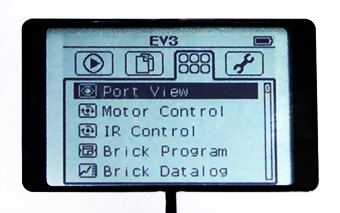
Port View: Color Sensor Values
You can see the Number value of the currently detected color directly on the EV3's viewscreen,
1. Use the Left and Right Buttons on the EV3 to navigate to the EV3 Apps menu ( ),
and press the Enter Button to select 'Port View Mode'. ),
and press the Enter Button to select 'Port View Mode'.
|
|
|
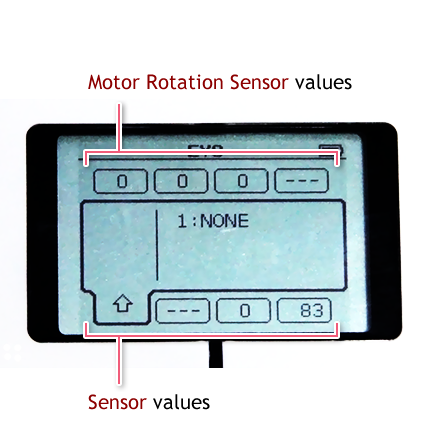
The 8 blocks at the top and bottom of the screen represent the 8 ports on the EV3.
- Motor Rotation Sensor values are displayed across the top. |
|
|
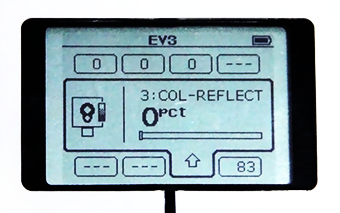
2. Use the Left and right Buttons so that the Color Sensor's Port View block is selected. "COL-RELECT" means the sensor is reading amount of colored light being reflected.
This is not what we want, since we want to see exactly what color the sensor is seeing, not the amount of color. |
|
|
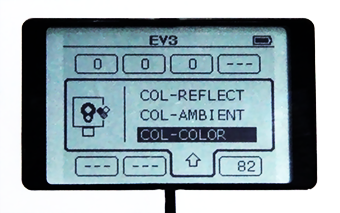
3.Press the Enter Button on your EV3 while the Color Sensor's Port View block is selected. Move the Up and Down Buttons to select the type of reading 'COL-COLOR', and press the Enter Button to set new reading type. |
|
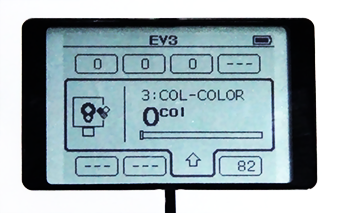
| 4.Now the Color Sensor's Port View will display the color value. ('COL-COLOR') |
|
|
The number 5 appears, representing Red. |
|
The number 2 appears, representing Blue. |
|
The number 0 appears, representing No Color Detected.. |
Did you know?
How the Color Sensor Works