The VEX IQ is a fully programmable device that enables users to incorporate motors, sensors, an LCD screen, and a remote control system all in one robot. Inside of the IQ, there is a single processor that handles the program execution and the passing of commands to input and output devices.
The VEX IQ Robot Brain can be connected directly to a computer using a micro-USB cable. It can also connect to a VEX IQ Controller either by being directly tethered via a standard ethernet cable, or wirelessly using the 900Mhz Radio Modules.
When setting up an IQ Robot Brain for the first time, you will want to ensure the 'VEX IQ Firmware Update' program is run at least once to ensure that the firmware on the Robot Brain and all attached devices are up to date. Once that is completed, it is a simple matter of downloading the ROBOTC firmware to the IQ Robot Brain in order to get it working with ROBOTC.
This is a guide for setting up a VEX IQ Robot Brain using the micro-USB cable. These steps are required the first time you use your computer to program a specific VEX IQ, or after you've updated ROBOTC to the latest version.
Once you've successfully completed these steps, you will be able to download and run ROBOTC programs on the VEX IQ Robot Brain.
Note:
Administrative privileges are required for some of these steps.
Drivers for the VEX IQ are installed automatically when the VEX IQ Firmware Updater is installed. Because of this, the VEX IQ files are not automatically downloaded when ROBOTC is installed.
Connect the VEX IQ Robot Brain directly to a USB port on your computer using the micro-USB cable. Once the IQ is connected to the computer, turn it on by pressing the check button.
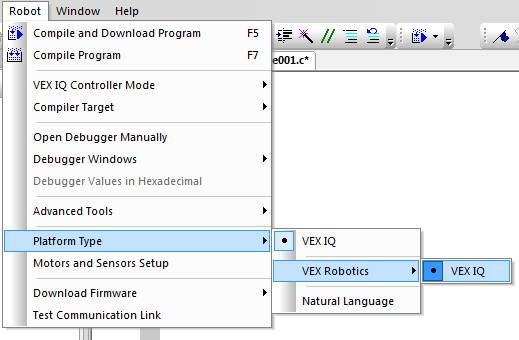
1) The next step is to specify that a VEX IQ Robot Brain will be used and to determine which Windows COM port it is plugged into. Go to Robot -> Platform Type ? Innovation First (IFI) and select "VEX IQ".
Note:
You should choose "VEX IQ" if you plan on programming using the standard text-based ROBOTC language. Enable the "Natural Language" option if you want to take advantage of the Natural Language commands and interface in ROBOTC.
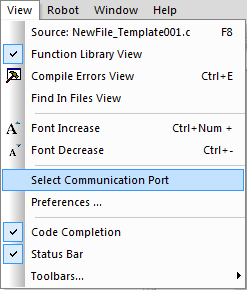
2) Once the Platform Type is set, navigate to the 'View' menu and choose Select Communication Port.
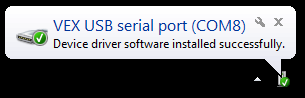
3) The 'Select Communications Port for Platforms' window will appear. From the Communications Port drop down list, you should see an "Automatic Selection" option and another "COMX (VEX USB Serial Port)" option.
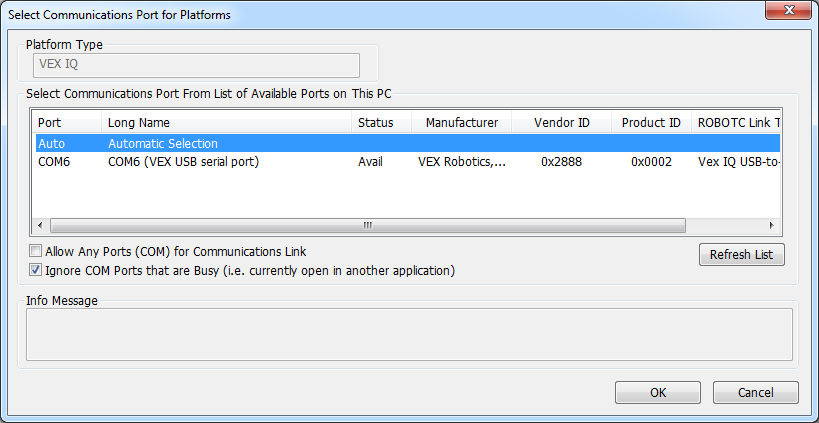
Note:
If the "Vex USB Serial Port" option does not appear in the drop down menu when a VEX IQ is connected to the computer, this may indicate that Windows has not recognized the device or access to it is blocked. Ensure that the VEX IQ Device Driver was successfully installed with Administrative Privileges, disconnect and reconnect your IQ from the computer, and press "Refresh List" to force ROBOTC to repopulate the list.
1) Navigate to Robot -> Download Firmware and select the "Standard File" option. This will start the firmware download process.
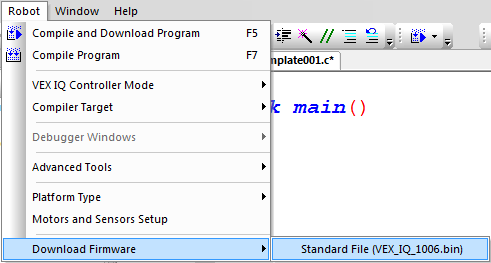
2) A Download Progress window will appear, showing the progress of the ROBOTC Firmware download.

3) When the download reaches 100%, the process will be complete and the firmware download windows will automatically close.
Notes:
You only need to download the Firmware once, when you first start using a VEX IQ with ROBOTC, or when you upgrade to a newer version of ROBOTC. You do not need to re-download the firmware every time you want to download code. If the download fails, disconnect the VEX IQ from your computer and turn it off. Then reconnect it to the computer, allow a few seconds to ensure that Windows recognizes it, turn it on, and try downloading the firmware again.
ROBOTC contains a large library of sample programs to help you get started. These sample programs can be downloaded to your VEX IQ using the micro-USB cable.
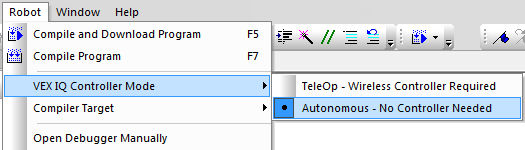
The VEX IQ Controller Mode controls which 'mode' directory the program is downloaded to (TeleOp (for remote control) or Autonomous (for autonomous)). The TeleOp option utilizes the VEX IQ Controller to allow remote control of the robot, while the Autonomous option allows for fully autonomous programming.
1) The TeleOp option requires the IQ Controller to be connected to the Robot Brain either wirelessly (using the 900MHz Radio Modules) or hardwired (using an ethernet cable plugged into the 'Tether' ports) in order for the program to operate; the Autonomous option will execute the program regardless of whether or not a IQ Controller is connected to the IQ Robot Brain.
2) To open a sample program, go to File -> Open Sample Program.
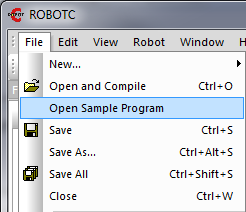
3) Navigate to the Basic Movement folder and open "Moving Forward.c".

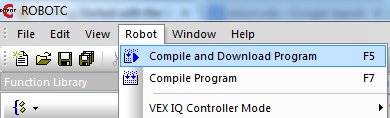
4) Make sure that your robot is connected to the computer and turned ON. Then navigate to Robot -> Compile and Download Program.
There are two main ways programs can be run from the IQ Robot Brain.
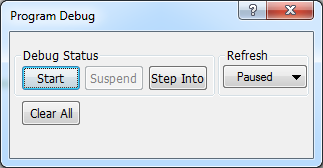
1) The first option is to use the Program Debug window that appears when a program is downloaded to the VEX IQ Brain.
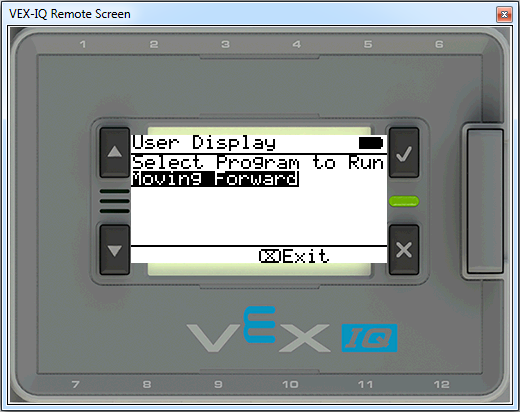
2) The second option is to use the VEX IQ Robot Brain's LCD and navigation buttons to select and start a program manually. Navigate to the program in the IQ Robot Brain and use the check button to manually start the program.