This is a guide for configuring the VEX Cortex system to be programmed wirelessly using a VEXNet connection. These steps are required the first time you use your computer to program a specific VEX Cortex, or after you've upated ROBOTC to the latest verstion.


Once you've successfully completed these steps you can download your own programs without revisiting them.


Note:

Administrator privileges are required for some of these steps.


Note:

ROBOTC 3.05 and later automatically installs the necessary drivers for the VEX Cortex, VEXnet Joysticks, and USB-to-Serial Programming cable. If you need to download the drivers for troubleshooting purposes, you can still find them at www.ROBOTC.net/download/vexrobotics


Step 1: Connect the Cortex to your PC

  • Connect the VEX Cortex directly to a USB port on your computer using the USB A-to-A cable. Allow a few seconds for Windows to recognize the device.


Vex2-getting-started-connect.JPG

  • Connect a 7.2V Robot battery to the Cortex and move the POWER switch to the ON position. Optionally, you can connect two motors to MOTOR Ports 2 and 3 for testing a sample program later in the sequence. You can connect 3-wire motors directly, or the newer 2-wire motors using Motor Controller 29 cables.


Vex2-getting-started-battery motors.JPG

Note:

Technically, the battery is not necessary for downloading Master CPU Firmware and ROBOTC Firmware, but it has helped in cases where the USB ports on the computer provide too little power to facilitate a reliable connection to the Cortex.


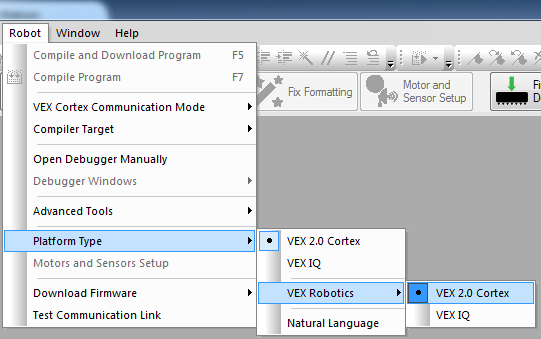
Step 2: Platform Type and Communication Port

  • Specify that you are using the Cortex and how it is connected to your computer in ROBOTC. Go to the Robot → Platform Type → VEX Robotics menu option and select "VEX 2.0 Cortex".


Note:

You should choose "VEX 2.0 Cortex" if you plan on programming using the standard ROBOTC language. Click the "Natural Language" option if you want to take advantage of the Natural Language commands in ROBOTC.

  • Next, go to View and choose Select Communication Port.


Comm port.png

  • The Select Communications Port for Platforms window will appear. From the Communications Port drop down list, you should see "Automatic Selection" and one of two additional options:

    If your VEX Cortex is in "bootload mode" or running an older (2.x) version of the Master CPU Firmware, it will appear as a "USB Wired Cable" option in the list.


  • If your VEX Cortex is running a newer (3.x) version of the Master CPU Firmware, it will appear as a "Vex Robotics Comm Port" in the list.


Make sure that "Automatic Selection" or one of the two legitimate options is selected. If you ever plan on programming your robot wirelessly over VEXnet, choosing "Automatic Selection" is recommended. Press OK to save your choice.


Note:

If the "USB Wired Cable" or "Vex Robotics Comm Port" options do not appear in the drop down menu when a VEX Cortex is connected, this may indicate that Windows has not recognized the device or access to it is blocked. Ensure that the VEX Cortex Device Driver was successfully installed with Administrative Privileges, disconnect and reconnect your Cortex from the computer, and press "Refresh List" to force ROBOTC to repopulate the list.


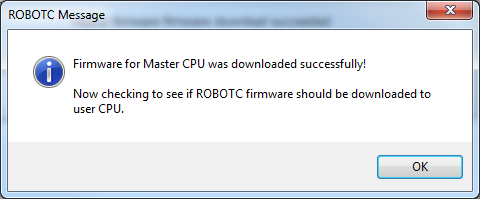
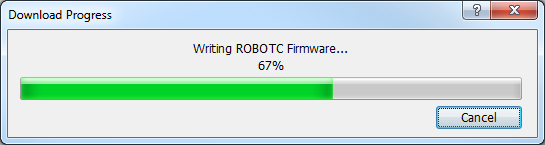
Step 3: Updating VEX Cortex Firmware

  • Go to Robot → Download Firmware and select "Automatically Update VEX Cortex".


  • A message will appear, informing you that the software will update your Cortex to the latest Master CPU and ROBOTC Firmware files. Press OK to begin the process.


  • A Download Progress window will appear, showing the progress of the Master CPU Firmware download.


  • When the Master CPU Firmware download is complete, a ROBOTC Message will appear and inform you that it will now update the ROBOTC firmware, if needed. Press OK to continue the process.


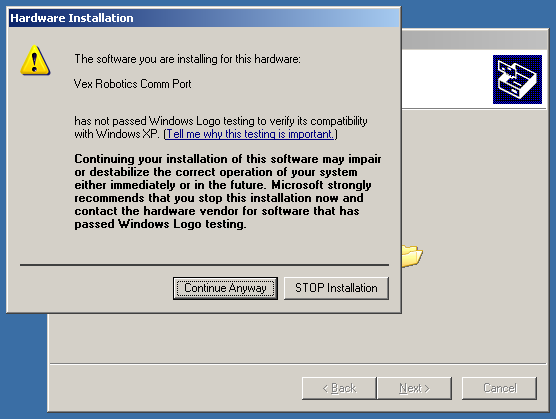
Note:

If this is the first time a VEX Cortex running the 3.x or higher Master CPU Firmware has been connected to your computer, Windows will recognize it as a new device, and may prompt you to verify the new hardware installation. Press Continue or Continue Anyway to complete the installation.


New hw.png

  • If your ROBOTC Firmware is out-of-date, another Download Progress window will appear and begin the ROBOTC Firmware download.


  • When the download completes, another ROBOTC Message will appear. Press OK to complete the process.


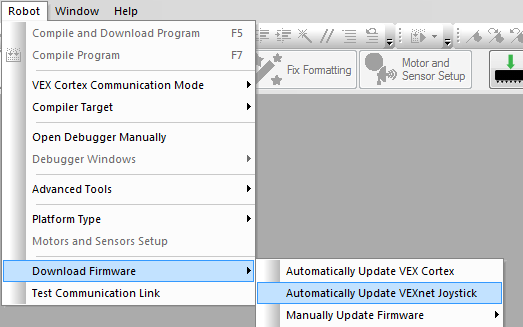
Step 4: Updating VEXNet Joystick Controller Firmware

  • Disconnect the USB cable from the Cortex and plug it into the USB port on the back of the VEXNet Joystick Controller.


  • Go to the Robot → Download Firmware menu option and select the "Automatically Update VEXNet Joystick".


  • The Joystick Controller Master CPU Firmware file will then be downloaded to the Joystick Controller (there is no ROBOTC firmware residing on the Joystick Controllers). Once the process is complete, you may disconnect the Joystick Controller from the computer.

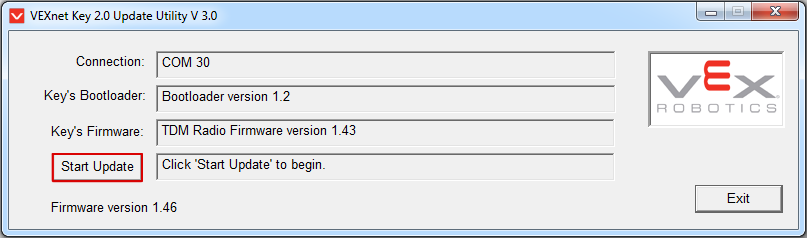
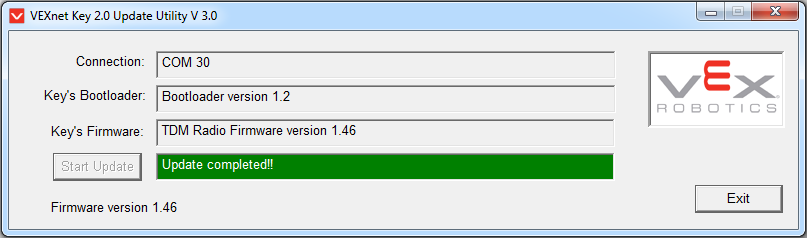
Step 5: Updating VEXNet Key's firmware (2.0 and later only)

  • VEXNet 2.0 Keys have a separate firmware that resides inside of the individual keys, and may need to be upgraded before use.VEXnet 1.0 Key users can skip to Step 6.

  • First, download and run the 'VEXNet Key 2.0 Firmware Upgrade Utility' from VEX's software download page: http://www.vexrobotics.com/wiki/Software_Downloads.


  • Open the VEXNet 2.0 Firmware Upgrade Utility and plug the VEXNet 2.0 key you wish to upgrade into your computer's USB port. Click the 'Start Update' button within the Utility to start the firmware upgrade process.


  • Repeat the process with any remaining VEXNet 2.0 keys that require upgrading.


Step 6: Pairing the VEXNet Joystick Controller and Cortex

  • The Cortex and VEXNet Controller must be paired together before the VEXNet system will work properly. In order to pair the Cortex and VEXNet Joystick Controller, you must:

    • Unplug the Cortex from the computer and turn the Cortex off
    • Connect the Cortex to the Joystick Controller via the USB A-to-A cable (NOT the Programming Hardware kit)
    • Once the two devices are physically connected, turn on the Cortex and wait for the VEXNet light on the Cortex and Joystick Controller to turn green


  • This will connect the two devices and pair them properly so they will only communicate with one another. To pair the Cortex or Joystick Controller with another device, simply repeat the pairing process with the other device instead.

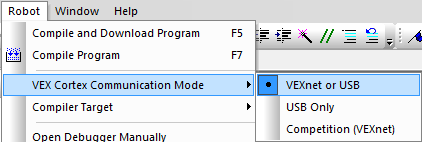
Step 7: Setting Cortex Communication Mode

  • Open up a program you would like to load onto the Cortex. For the purposes of this tutorial, we selected the 'Dual Joystick Control' program from the 'Remote Control' Sample Programs folder.

Cortex VEXNet Sample Prog.png

  • With the Cortex turned on and plugged in, navigate to 'VEX Cortex Communication Mode' under the 'Robot' menu. Select 'VEXNet or USB' as the communication type.


  • Compile and download the program to the Cortex. ROBOTC will pop up a message telling you that the communication mode has been changed and that a power cycle is required in order for the changes to take affect.


  • Once the program has downloaded to the Cortex, turn the Cortex off and back on. This 'power cycle' commits the communication type to the Cortex. Remember, you must repeat this process to revert back to USB only (making sure that USB only is selected as the mode). The Cortex should now be set up for wireless communication over VEXNet.

Note:

Once these steps are complete, you should no longer need Administrative privileges on your computer; you should be able to download Master CPU Firmware, ROBOTC firmware, and ROBOTC programs in a permissions-restricted account. Only future updates to ROBOTC and the VEX Cortex Device Driver will require Administrative privileges.


Exception: On some computers, Windows may prompt you to "install new hardware" each time the Cortex is plugged in on a different USB port. To alleviate the issue, connect the updated VEX Cortex on each USB port as an administrator (no need to redownload firmware), or dedicate one USB port for communication with the VEX Cortex.


You only need to download the Firmware when you first start using a VEX Cortex with ROBOTC, or when you upgrade to a newer version of ROBOTC.


You do not need to re-download the firmware every time you want to download code. If the download fails, disconnect the VEX Cortex from your computer and turn it off. Then reconnect it to the computer, allow a few seconds to ensure that Windows recognizes it, turn it on, and try downloading the firmware again.